Posted on December 21st, 2018 by admin
This guide will provide you with detailed instructions to configure your My Hosting Bubble email account on the Huawei P20 Lite
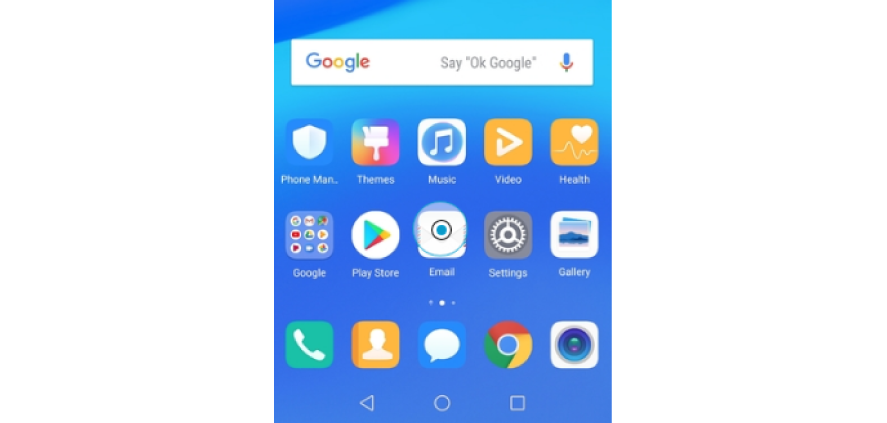
- We will start by making sure your phone is connected to the internet, and then opening your phone and clicking on the ‘Email‘ icon to begin setting up your email
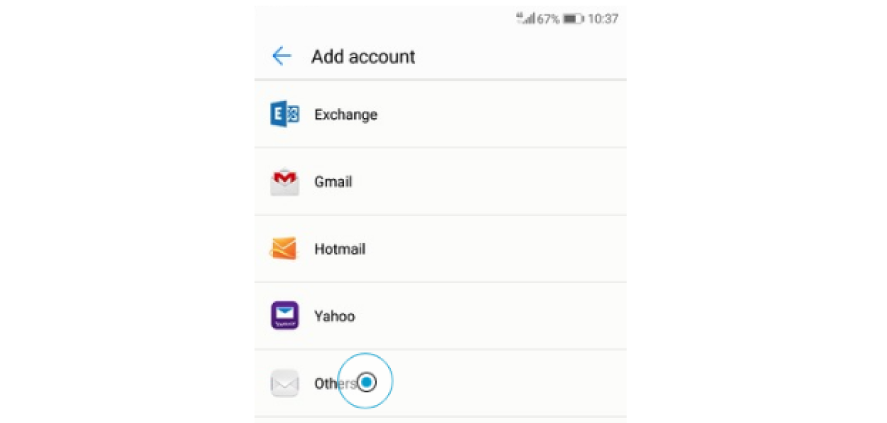
- Select Others
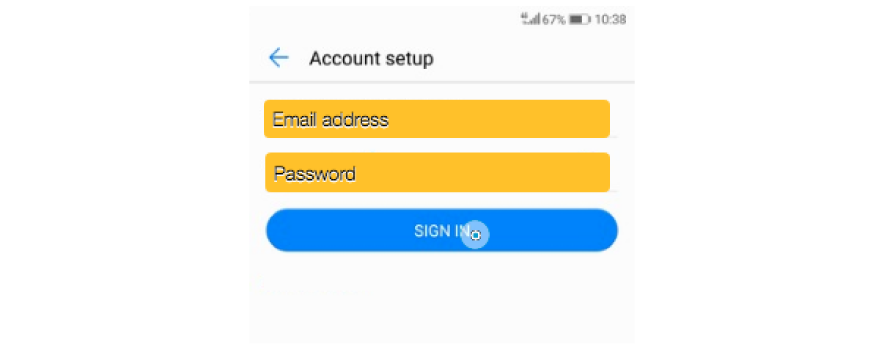
- Enter your Email address and password, then select SIGN IN
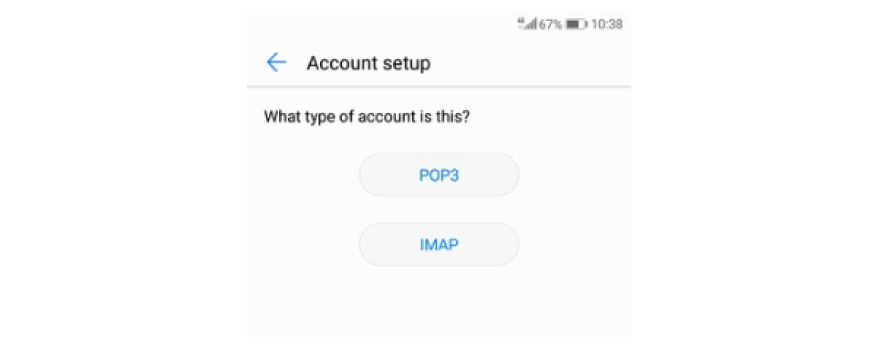
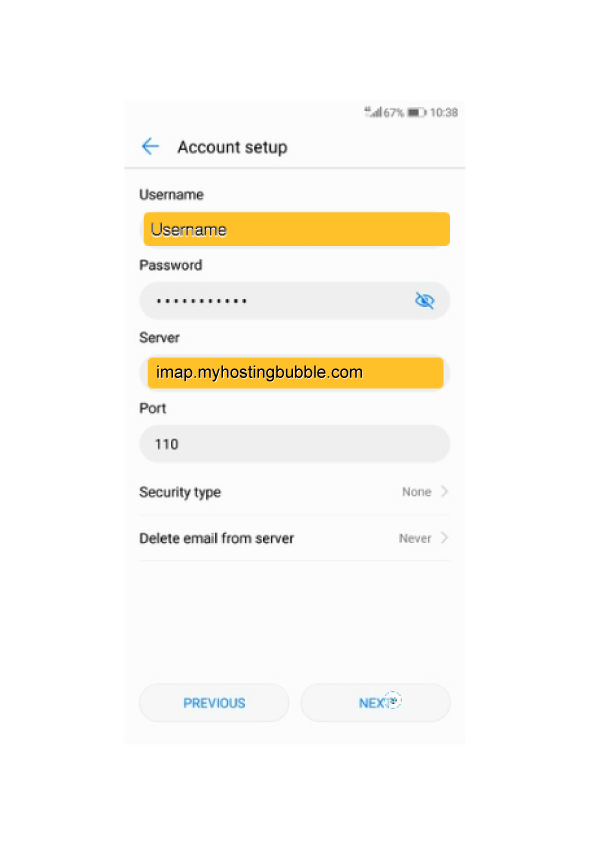
- Select ‘IMAP’
- Next enter your User Name, which is your email address, and now we will add the details for your Incoming Mail server, the details for your Incoming Mail Server are imap.myhostingbubble.com,
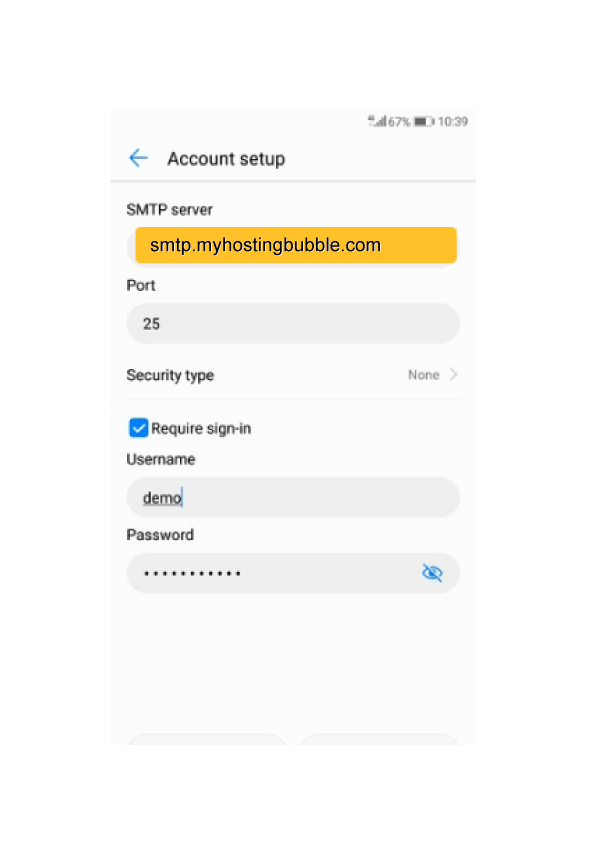
- Next we will add the details for your Outgoing Mail Server, your Outgoing Mail Server details as smtp.myhostingbubble.com
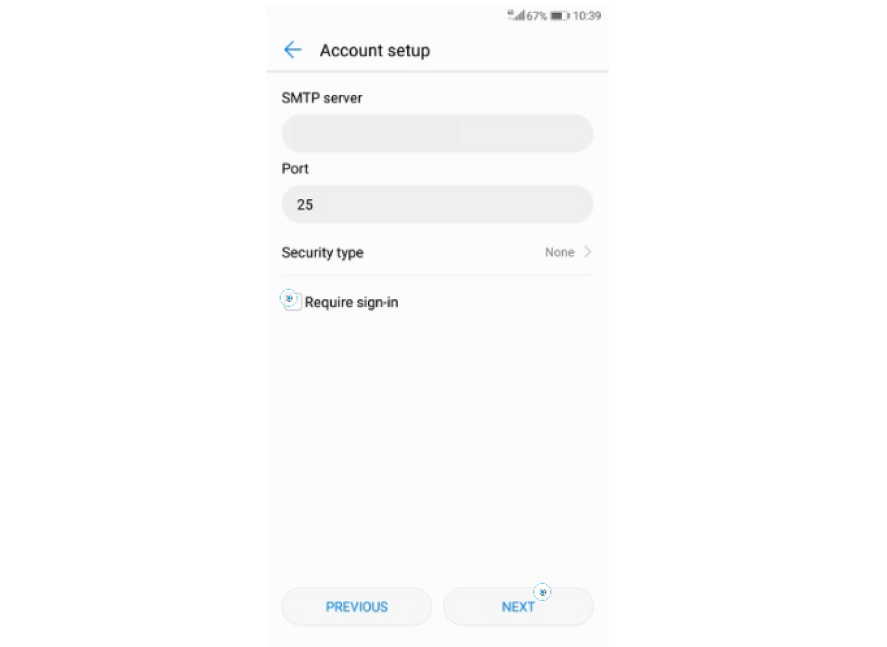
- Uncheck the require sign-in checkbox and please click on ‘Next’
- Now click ‘Next’
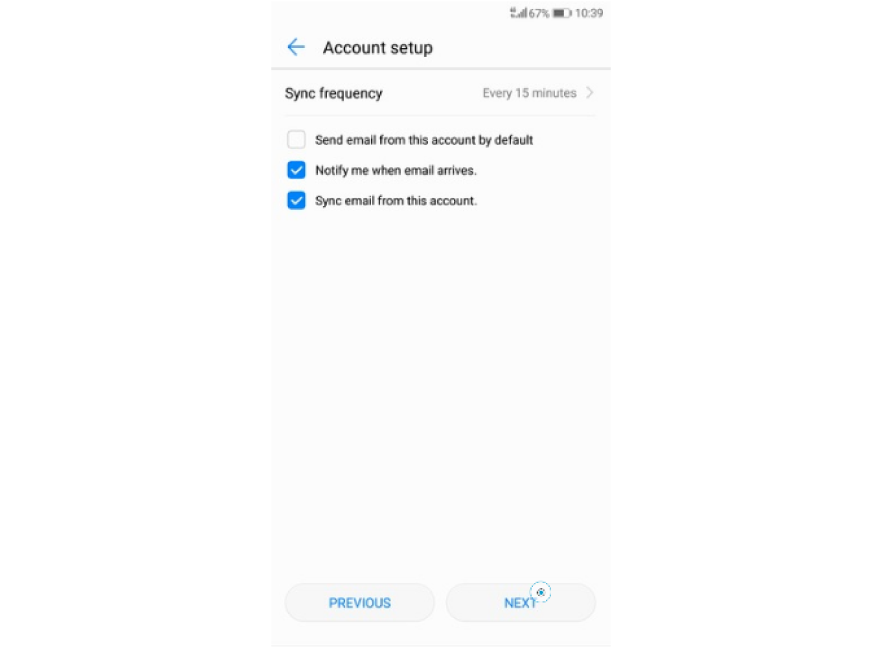
- Your Email account is now all set up to use.
For more tips and other guides please check out our other blogs or visit our YouTube channel and subscribe.
Test your email, by sending an email using this link emailtest@myhostingbubble.com and you will receive an email back confirming that your account works.
If your email fails to send, or you do not receive an email back check out our email test page for tips here or review the steps you took above.