
Posted on February 1st, 2017 by Tim Ennals
This guide will provide you with detailed instructions to configure your My Hosting Bubble email on a Pc with Windows 10 Mail.
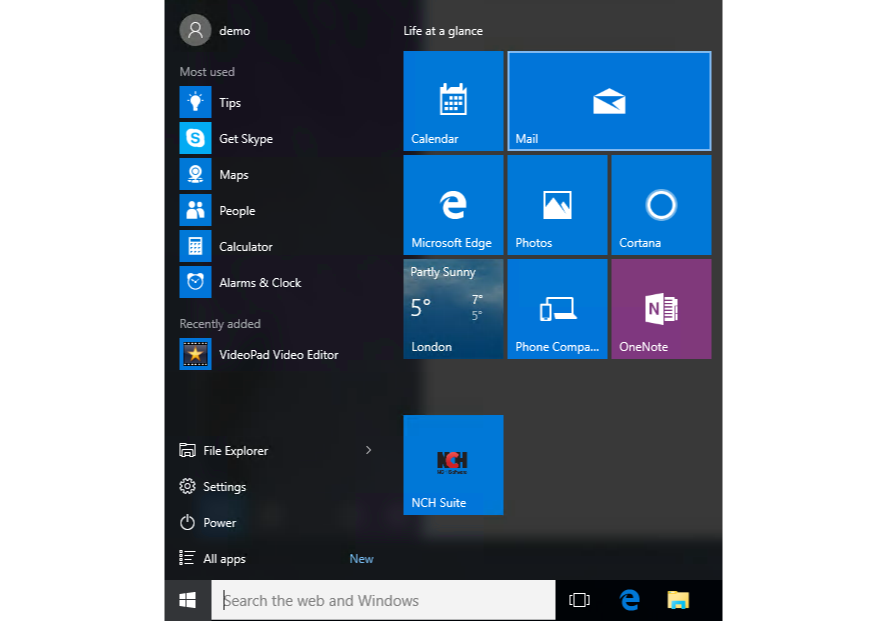
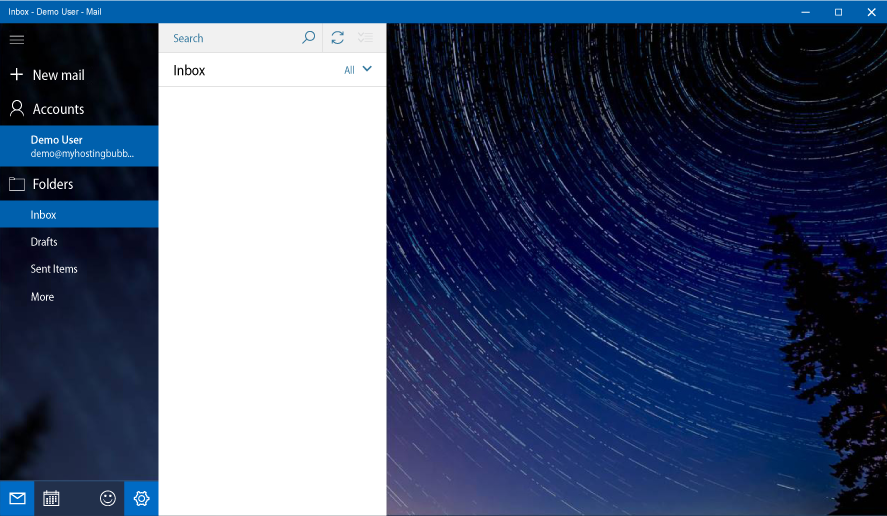
- We will start by opening your ‘Windows Start Menu’ at the bottom left of your screen, then Selecting the ‘Mail’ Icon at the upper right
- Click on the ‘Settings‘ cog icon

- Now click on ‘Manage Accounts’

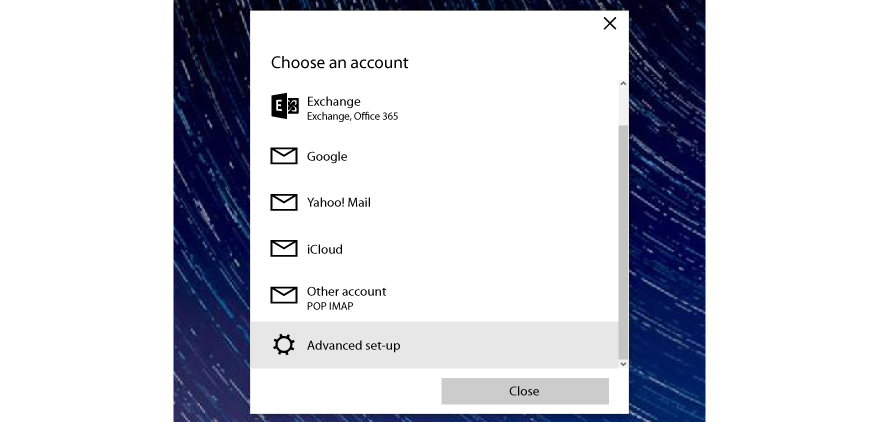
- Next click on ‘Add account’

- Scroll down until you see ‘Advanced set-up‘ and click on it
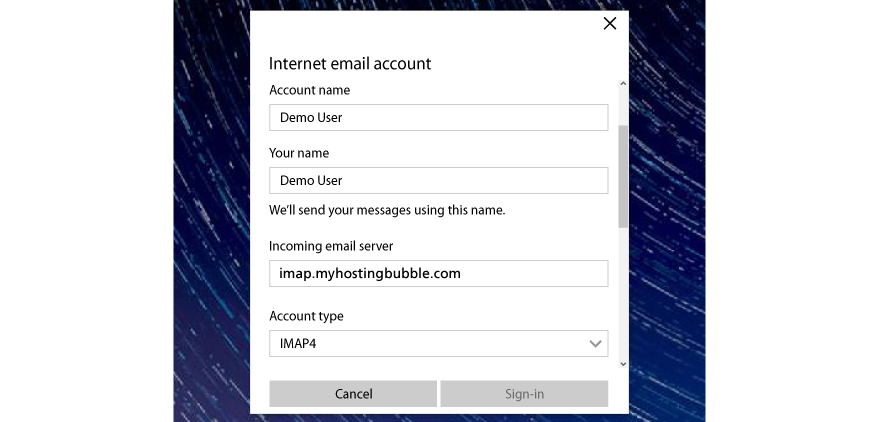
- Now enter your ‘Account name‘ and ‘Your name‘ followed the details for your ‘Incoming email server’ which is imap.myhostingbubble.com and now select your ‘Account type‘ and set it to ‘IMAP4′
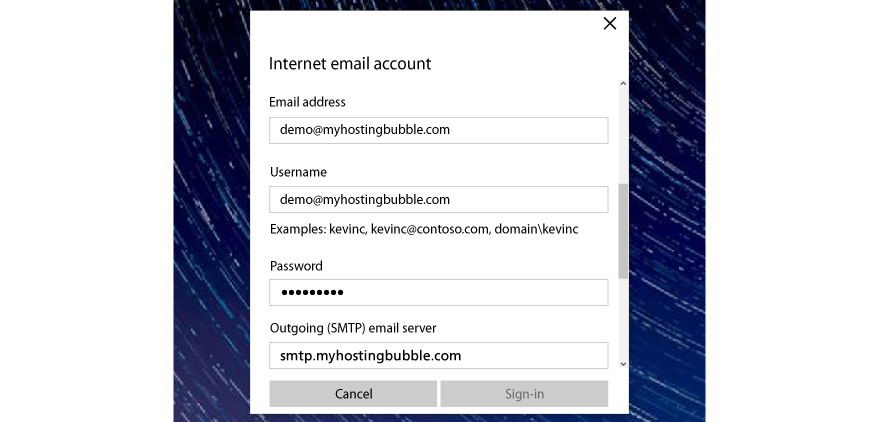
- Scroll down and enter your ‘Email address‘ ‘Username‘ the Username is your email address, and ‘Password‘ now enter your ‘Outgoing (SMTP) email server‘ details as smtp.myhostingbubble.com
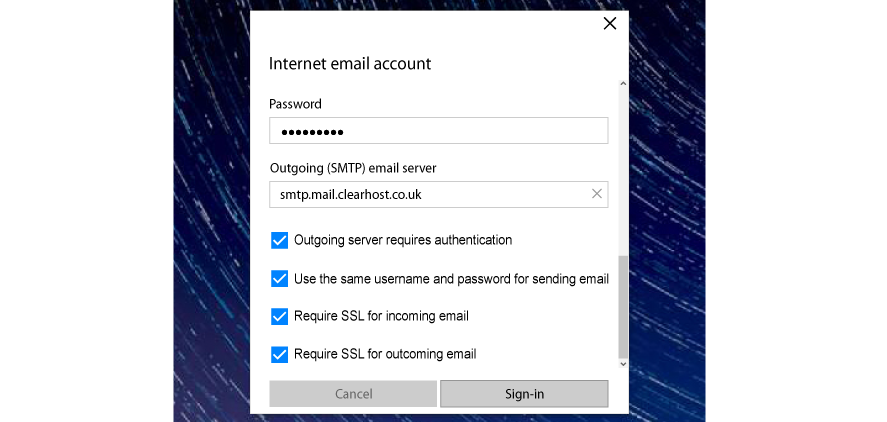
- Scroll down and check the security options are all ticked and click ‘Sign-in‘
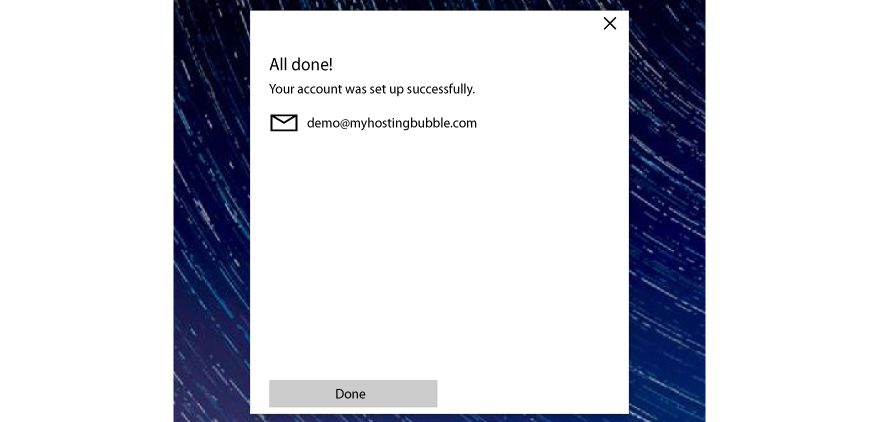
- Finally click ‘Done’ and your Email account is now all set up.
- You will now see the email account you just set up, ready to use in the left hand side bar.
the technical video guide, and for more tips and other guides please check out our other blogs or visit our YouTube channel and subscribe.
Test your email, by sending an email using this link emailtest@myhostingbubble.com and you will receive an email back confirming that your account works.
If your email fails to send, or you do not receive an email back check out our email test page for tips here or review the steps you took above.